-Метки
-Рубрики
- животные (16)
- фото (5)
- английский язык (5)
- интересное (3)
- архитектура,строительство (23)
- аудиокниги, электронные книги (33)
- вязание (1492)
- варежки, перчатки, митенки (62)
- детская одежда (57)
- женская одежда (380)
- журналы, книги, блоги, альбомы (101)
- крючок (87)
- машинное вязание (102)
- мужская одежда (33)
- носки, следки, тапочки, сапожки (85)
- палантины, шарфы, шали, пончо, снуды, пледы (140)
- уроки, рисунки, техника вязания, разное (329)
- шапки, береты (208)
- гимнастика (39)
- грамотность (3)
- дача,дом (333)
- ландшафт, декоративные растения (64)
- дачное хозяйство (19)
- огород (192)
- плодовый сад, (93)
- деньги (2)
- детям (10)
- домашнее хозяйство (181)
- дизайн,интерьер,текстиль (54)
- полезные советы (порядок) (49)
- ремонт (7)
- живопись (51)
- заготовки на зиму и впрок (484)
- варенье,джемы,компоты,сладости (145)
- соленья,салаты,овощи,грибы,мясо (301)
- закон (1)
- здоровье (523)
- народная медицина (378)
- похудение (75)
- история (4)
- йога (3)
- кино (2)
- компьютер (19)
- красота,уход за собой (180)
- кулинария (1836)
- низкокалорийные блюда (205)
- второе блюдо (403)
- закуски,соусы (304)
- каши, молочные продукты (17)
- мясо птицы (173)
- мультиварка,свч (99)
- мясо,печень (173)
- напитки (64)
- несладкие мучные изделия (284)
- овощи,грибы (175)
- первое блюдо (63)
- рыба,морепродукты (164)
- салаты (170)
- сладкие мучные изделия (501)
- сладкое (89)
- литература (3)
- мода (138)
- мудрые мысли (9)
- музыка (9)
- обучающие фильмы (3)
- полезные советы (56)
- Праздники (15)
- психология (30)
- путешествия,города,страны (27)
- работа в интернете (21)
- разное (26)
- рукоделье (115)
- Войлок, валяние (13)
- украшения (7)
- разное (6)
- бисер,духи,мыло (4)
- вышивка (20)
- лепка (3)
- поделки (67)
- стихи (57)
- Шитье (465)
- головные уборы,сумки,для дома,подушки,разное (27)
- детская одежда (5)
- женская одежда (36)
- книги,журналы (1)
- мужская одежда (3)
- технология,ткани (18)
- религия,мистика,сонник (24)
- юмор (31)
-Цитатник
Носки спицами Ажурные носки «Granola» Автор: Теплоножка ...
Фруктовый мармелад - (0)Фруктовый мармелад - самый простой рецепт Фруктовый мармелад - самый простой рецепт,которого п...
ВЯЗАНИЕ СПИЦАМИ - ЯРКОЕ КРЕАТИВНОЕ ВЯЗАНИЕ - КРАСИВЫЕ ЯРКИЕ ВАРЕЖКИ СПИЦАМИ - (0)Вязание спицами - Яркое креативное вязание - Красивые яркие варежки спицами ...
ТЕХНИКА ВЫШИВКИ РОКОКО "ОТ А ДО Я". КНИГА ПО ВЫШИВКЕО "ОТ А ДО Я". КНИГА ПО ВЫШИВКЕ - (0)от A до Я техника рококо. 1.<<>> 2. 3. 4. 5. 6. 7. 8. 9. 10. 11. 12. 13. 14. 15. 16. 17. 1...
ВЫШИВКА ПО ТРИКОТАЖУ - ТЕХНИКА ВЫШИВКИ ПО ТРИКОТАЖУ СО СХЕМАМИ И ДВУМЯ ПОДРОБНЫМИ ВИДЕО-МК - (0)Вышивка по трикотажу - Техника вышивки по трикотажу со схемами и двумя подробными видео-МК ...
-Приложения
 Я - фотографПлагин для публикации фотографий в дневнике пользователя. Минимальные системные требования: Internet Explorer 6, Fire Fox 1.5, Opera 9.5, Safari 3.1.1 со включенным JavaScript. Возможно это будет рабо
 СтенаСтена: мини-гостевая книга, позволяет посетителям Вашего дневника оставлять Вам сообщения.
Для того, чтобы сообщения появились у Вас в профиле необходимо зайти на свою стену и нажать кнопку "Обновить
 Толкование сновУзнайте в чем тайна вашего сна — стоит готовиться к чему-то плохому или, наоборот, надо чтобы сон обязательно сбылся. Вы непременно найдете толкование вашего сна, ведь в базе уже сейчас содержится 47
  ОткрыткиПерерожденный каталог открыток на все случаи жизни
-Ссылки
-Стена
-Я - фотограф
показ мод
-Музыка
- Garou - Je nattendais que vous
- Слушали: 30412 Комментарии: 0
-Поиск по дневнику
-Друзья
-Постоянные читатели
-Сообщества
-Статистика
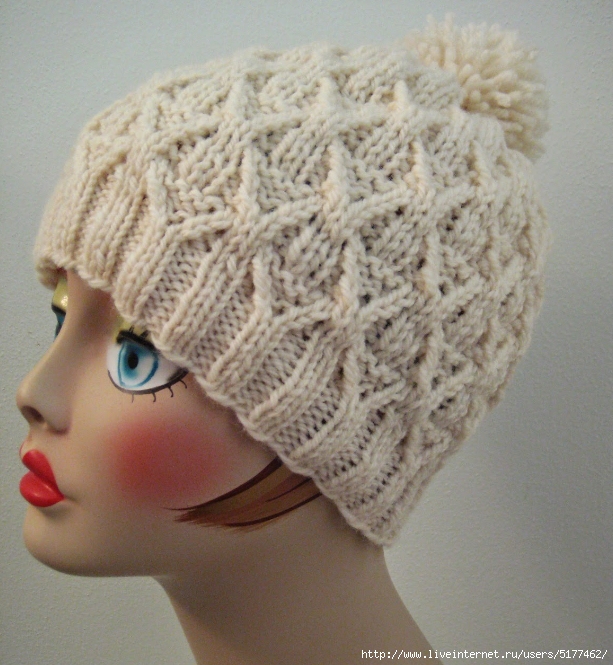
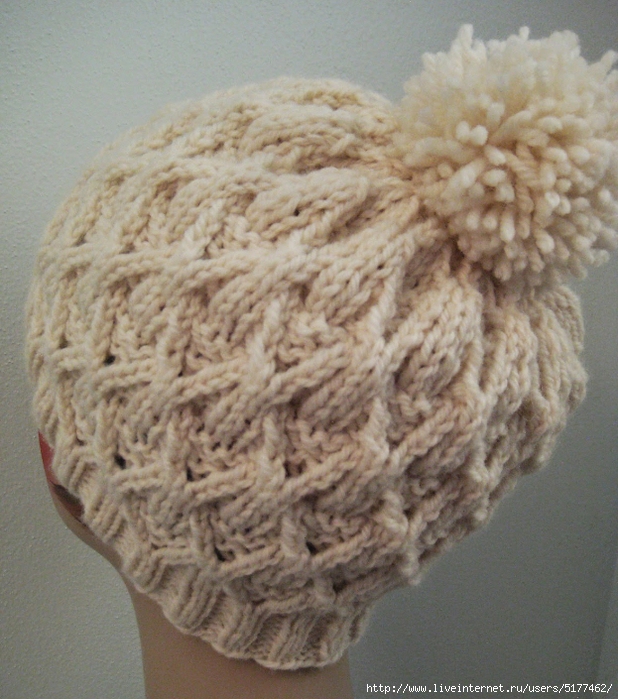
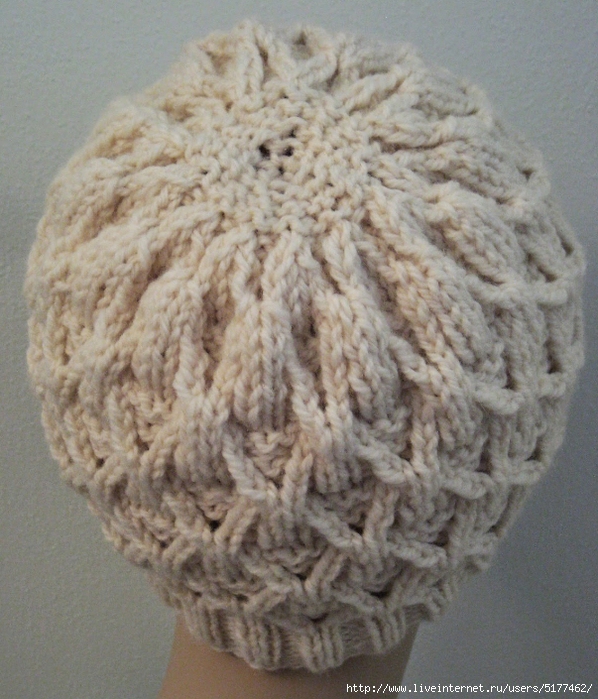
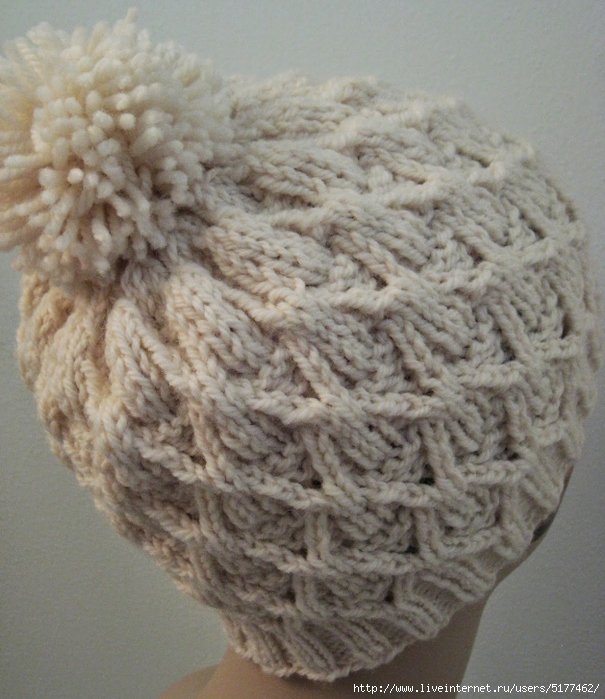
Белая шапка с помпоном |
Шапочка спицами
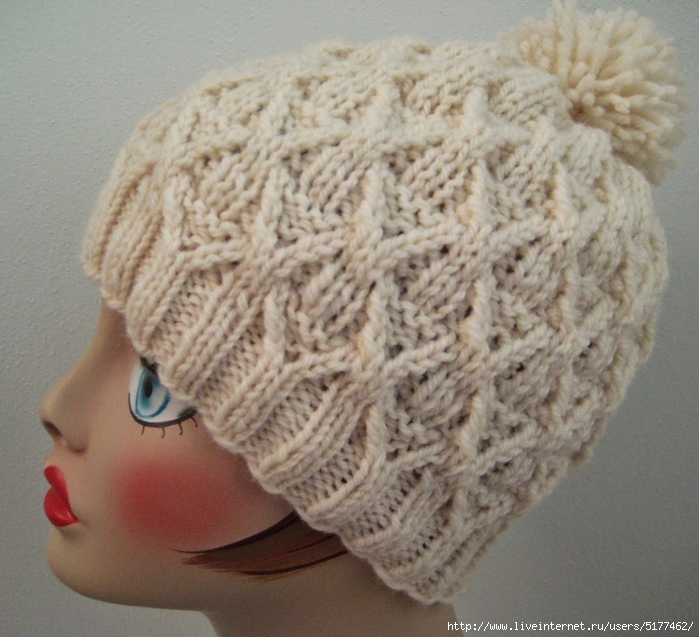
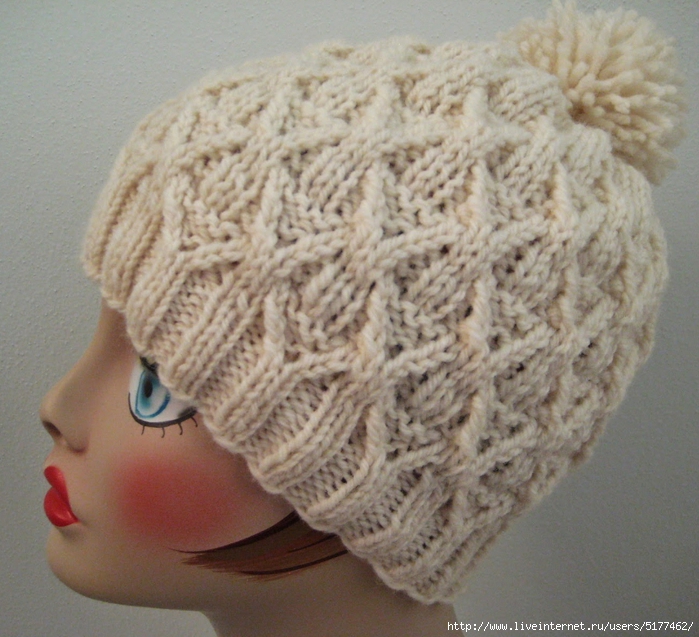
Yarn: Patons Classic Wool (100% Pure New Wool; 210 yards [192 meters]/100 grams); #202 (Cream) - one skein
Needles: 16" circular needle in size US 5, 16" circular needle in size US 8, one set of double pointed needles, also in size US 8
Notions: Tapestry needle, stitch marker
Gauge: 20 stitches = 4 inches on size 7 needles
So let's get started! First, using your size 5 needle, cast on 104 stitches, place marker, and join in round. Then, knit 1.5" in the following ribbing:
Ribbing Row: k1, * p2, k2; rep from *; end p2, k1
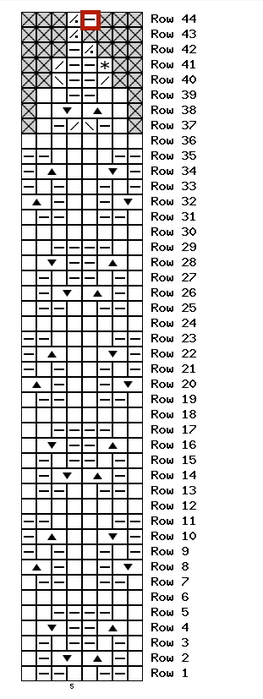
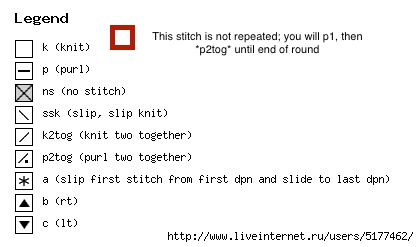
And once that's done, we'll switch to our size 8 needles and our main pattern, which is Wickerwork Pattern from page 146 of Barbara G. Walker's A Second Treasury of Knitting Patterns. For this pattern, we'll need the following notation:
rt (right twist): knit two together, leaving stitches on left-hand needle; next, insert right-hand needle from the front between the two stitches just knitted together, and knit the first stitch again. Finally, slip both stitches from left-hand needle together
lt (left twist): with right-hand needle behind left-hand needle, skip one stitch and knit the second stitch in back loop; then insert right-hand needle into the backs of both stitches and k2tog-b (knit two together through back loops, inserting right needle from the right)
And we'll proceed like so:
Row 1: k1, * p2, k2 *; end p2, k1
Row 2: * k1, p1, rt, lt, p1, k1 *
Row 3: * k1, p1, k1, p2, k1, p1, k1 *
Row 4: * k1, rt, p2, lt, k1 *
Row 5: k2, * p4, k4 *; end p4, k2
Row 6: knit
Row 7: same as row 1
Row 8: * lt, p1, k2, p1, rt *
Row 9: * p1, k1, p1, k2, p1, k1, p1 *
Row 10: * p1, lt, k2, rt, p1 *
Row 11: p2, * k4, p4 *; end k4, p2
Row 12: knit
Knit rows 1 - 12 three times, and then it's time to begin our decreases. So let's proceed as follows:
Decrease Row 1: * k1, p1, ssk, k2tog, p1, k1*
Decrease Row 2: * k1, rt, lt, k1 *
Decrease Row 3: * k2, p2, k2 *
You'll want to switch to your dpns now, if you haven't already
Decrease Row 4: * k2tog, p2, ssk *
Decrease Row 5: slip first stitch from first dpn and slide to last dpn; then, * p2, k2tog *
Decrease Row 6: * p2tog, p1 *
Decrease Row 7: purl
Decrease Row 8: * p2tog *
Decrease Row 9: p1, * p2tog *
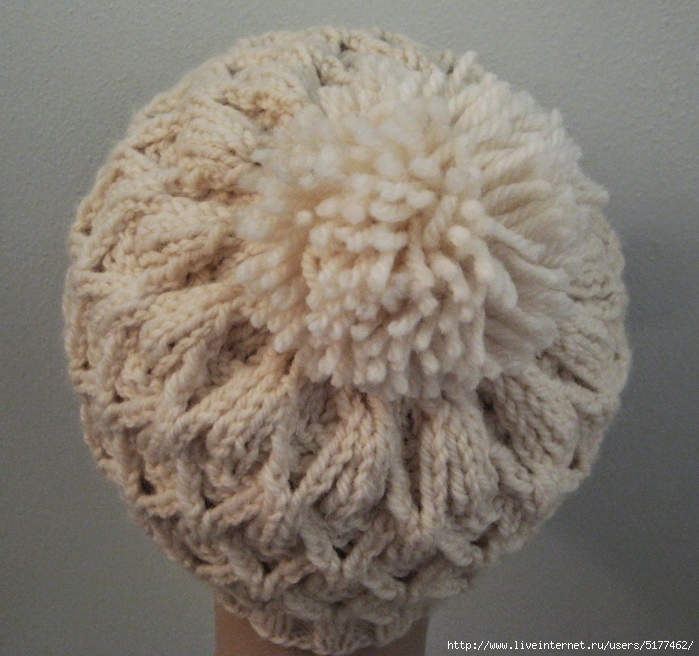
Clip tail and, using tapestry needle, thread through final 7 stitches. Pull tight, thread to inside of hat, and knot. Tuck in ends. If desired, make pompom and affix to hat. Put on and twirl happily.
| Рубрики: | вязание/шапки, береты |
| Комментировать | « Пред. запись — К дневнику — След. запись » | Страницы: [1] [Новые] |


